With the Fourth of July fast approaching, we decided to make a flag cake to celebrate. We didn’t want to settle on a typical decorated sheet cake, so we raised the stakes and made a layered cake that would look like a flag when you cut into it. The results were…. interesting to say the least. While the cake looked good, it took a lot of cake, a lot of time, and a whole lot of patience to reach the final product. If you’re short on time or new to baking, you might want to stick to the sheet cake. However, we think that the method that we used is a little bit easier than some of the other methods we found online. Who knows, you might surprise yourself with how well it turns out! 🙂
To start, we used three cake mixes: white, red velvet, and blue velvet. Each box made two 8-inch round cakes, so we had six cakes in total. *Note: We bought the Duncan Hines blue velvet mix and for some reason it had the texture of a rubbery pound cake. Moral of the story: Make a white cake and dye it blue.
 After we had baked all the cakes, we let them cool, wrapped them in tin foil, and then put them in the fridge to chill while we made the frosting. Chilling the cakes made them easier to shape when we assembled the tiers later. For the frosting, we made a simple vanilla buttercream (recipe at the end of this post) that was perfectly white and fluffy.

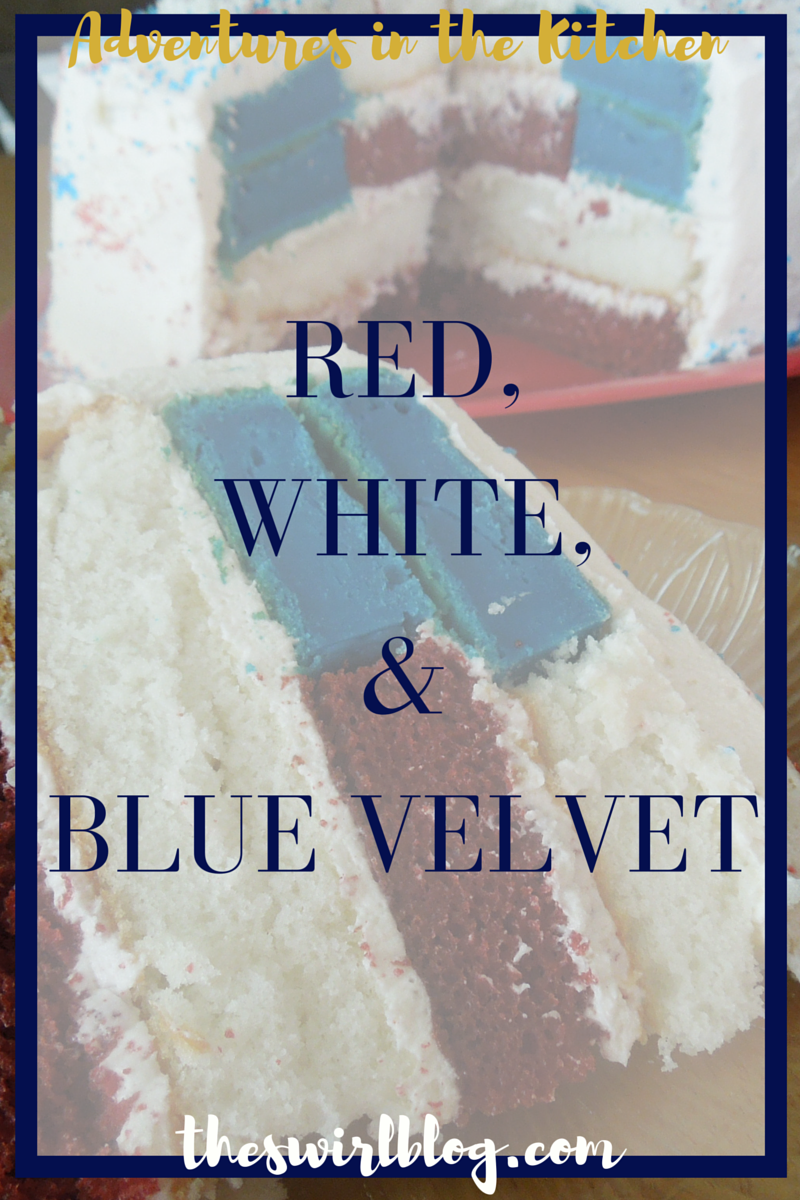
Next, we leveled all six cakes with a serrated knife to make them all the same height for easy stacking. We stacked one full red cake and one full white cake on top of each other, adding just a little bit of frosting in between the layers and on top of the white layer. Next, we cut the remaining 4 cakes in order to create the flag when we cut into it. To achieve this, we first stacked the two blue cakes on top of each other, with no icing in between. Then we placed a 4-inch diameter piece of paper over the center of the stack and cut out the middle of the two blue cakes. We then cut the remaining red cake and white cake using the same piece of paper used for the blue cakes, but instead of throwing away the middle of each cake, we threw away the outside ring so that the red and white layers could fit inside the blue layers and look like a real flag! It sounds really confusing, but the diagram below should help you to visualize how the layers will look and how the layers should be stacked.


Then we stacked the blue/white layer on top of the solid white layer, and the blue/red layer on top of the blue/white layer (with frosting only on the small white inner circle and not on the blue ring). With all of the cakes stacked, we covered the whole cake in the remaining white frosting and then added some festive red and blue sprinkles that we had around from making our Grilled to Perfection Cupcakes.
So there you go! Your very own flag cake. Honestly the biggest problems that we had were 1. the blue cake not turning out like all the other cakes and 2. trying to level the cakes perfectly and make sure they were the same height! If you’re up to the challenge and looking to impress your neighbors at your next Fourth of July barbecue, we really recommend making this cake! Scroll down a little bit to see our tips and tricks that will help you save time and energy so that you can enjoy celebrating with friends and family!
Tips & Tricks
- Dye your white cake mix blue, rather then using a blue velvet cake mix (If you’ve already used a blue velvet cake mix and it turned out well, go for it! And please let us know what brand you used and what we did wrong 🙂 )
- Grease and flour your pans really really well before baking, or you’ll never be able to get your cakes out all in one piece.
- Use a large spatula when transferring cakes (i.e. from the cooling rack to the plate), or your cakes will fall to pieces (and so will you).
- We didn’t put any frosting between the blue rings, which created a small space between the layers when we cut the cake. We would recommend dyeing a small bowl of frosting blue and using that in between the blue layers.
- Before you start layering cakes, pick what plate you want to use and then put 4 pieces of wax paper around the plate (leaving some room in the middle). This way you can assemble and frost the entire cake on your serving plate, and when you’re done frosting you can just pull away the wax paper (slowly!) to reveal a clean plate. So much easier than frosting the cake on a different plate and attempting to transfer all 4 (!) layers of cake over to your serving plate.
Vanilla buttercream frosting recipe (From FOOD.COM)
This is actually the recipe that Sprinkles Cupcake Bakery (based out of Beverly Hills) uses for their world-famous cupcakes! We like it because the buttercream flavor really shines through and compliments both vanilla and chocolate cake flavors! Note that we made a full batch plus another half batch to completely cover in between the layers and over the whole cake.
- 1 cup butter, softened
- 3 1 ⁄ 2 cups confectioners’ sugar
- 1 teaspoon milk
- 1 teaspoon vanilla extract
- 1 ⁄ 8 teaspoon salt
- In a bowl combine butter, sugar and salt. Beat till blended.
- Add the milk and vanilla and beat for an additional 3 to 5 minutes or until smooth and creamy.


